 Calabrian Calabrese Pepper Seeds: Unlock Authentic Italian Flavor
 You may be interested in…


Vegetable Gardening
How to Grow Peas from Seed: No Green Thumb Required
When you buy through links on our site we may earn a small commission at no additional cost to you.
Ever wondered how to grow peas from seed? It’s easier than you might think, and nothing beats the sweet crunch of home-grown peas! Peas are not only a great addition to your meals with their rich nutritional profile, but they also add charm to your garden. So, let’s dive into the world of peas and how you can cultivate your own, shall we?
Choosing Your Pea Variety
Before you get started on your journey to grow peas from seeds, it’s important to know that there are several varieties of peas to choose from. Each has its own characteristics, flavors, and preferred uses. Here are three main types you might consider:
Snow Peas
Also known as Chinese peas, these are the ones typically used in stir-fries. The pods are flat and the peas inside are very small. Snow peas are harvested when the pods are young and the peas inside have barely formed. They’re sweet, crisp, and perfect for eating raw in salads or lightly cooked.
Snap Peas
These are a cross between snow peas and garden peas, also known as sugar peas. The entire pod is edible, just like snow peas, but they’re typically fatter and crunchier, with fully formed peas inside. They’re sweet enough to be eaten raw but also hold up well when cooked. They can be eaten whole or shelled.
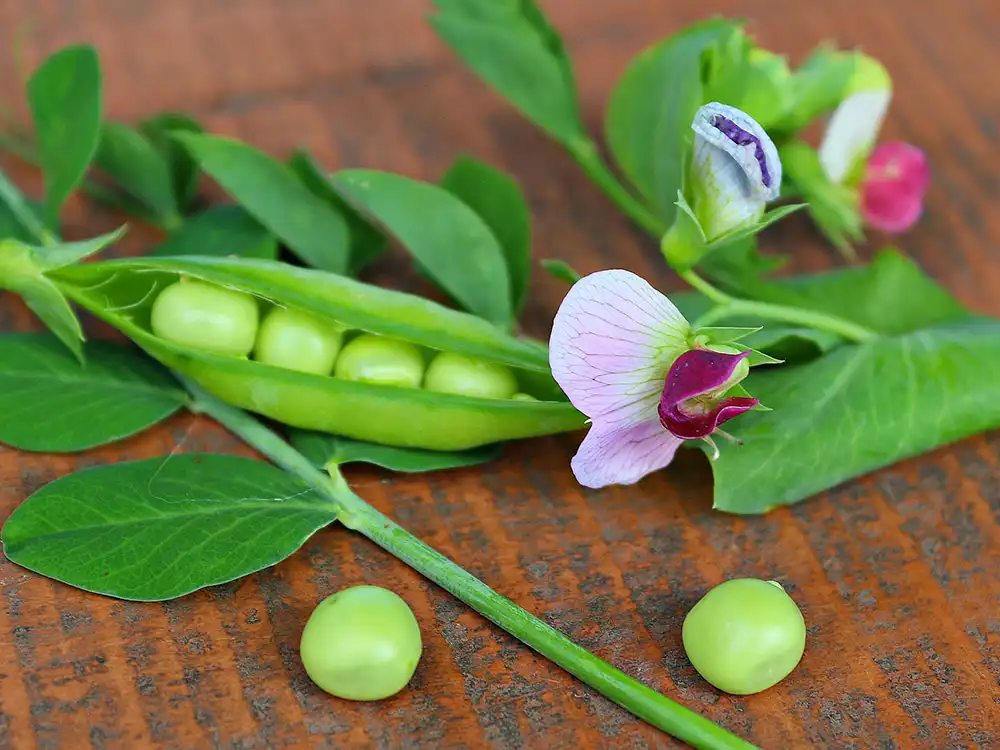
Garden Peas (or Shelling Peas)
These are the classic peas that need to be shelled before eating (the pods are too tough to eat). The peas inside are sweet and delicious, perfect for cooking, canning, or freezing.
Choosing the right variety depends on your personal preference and how you plan to use the peas. You might also consider factors like the plant’s growth habit (bush vs. climbing varieties), and the time to maturity, which can vary between varieties.
Popular Pea Varieties
Bestseller No. 1

Bestseller No. 2

Bestseller No. 3

Bestseller No. 4

Bestseller No. 5
When to Plant Peas
Timing is important when you plan to grow peas from seed. They prefer cool weather and can be started in the spring and fall.
Peas prefer cooler weather, which makes them perfect for early spring or fall planting. But keep an eye on your soil temperature. Peas need it to be about 45°F (7°C) to germinate.
Here’s what you need to know about when to plant peas:
Spring Planting
In the spring, peas can be planted as soon as the soil can be worked – that is, when it’s no longer frozen and has dried out enough to be tilled. Depending on your climate, this can be anywhere from February to April.
The soil temperature should ideally be around 45°F. However, peas can germinate in soils as cold as 40°F, although germination will be slower. If you plant too late in the spring and temperatures rise above 80°F, peas will struggle to produce pods.
Fall Planting
Peas also have a place in the fall garden. In regions with mild winters, you can plant a second crop of peas in late summer or early fall. The goal is to time your planting so that the peas mature before the first hard freeze. Consult a local planting calendar to get a more precise timing for your area.
Preparing the Soil

Proper soil preparation is key when you grow peas from seed. Peas are not overly demanding, but they do have a few specific requirements when it comes to soil conditions.
Here’s what you need to do to prepare your soil for planting peas:
Choose the Right Location: First, select a spot in your garden that gets full sun to partial shade. Peas can tolerate some shade, but they’ll produce the best yield in a sunny spot.
Check Soil Texture: Peas prefer well-drained soil. If the soil in your garden is heavy clay, consider adding some compost or well-rotted manure to improve the texture and drainage.
If your soil is too sandy and drains too quickly, adding organic matter can help retain moisture.
Test Soil pH: The ideal pH for peas is slightly acidic to neutral (6.0 – 7.0). You can test your soil’s pH with a soil test kit available at garden centers. If your soil is too acidic, you can add lime to raise the pH. If it’s too alkaline, you can add sulfur or compost to lower the pH.
Fertilize Thoughtfully: Peas are legumes and have the ability to fix nitrogen from the atmosphere, so they don’t need much, if any, additional nitrogen. However, they do benefit from a balanced organic fertilizer or a sprinkling of bone meal (for phosphorus) at planting time.
Loosen the Soil: Before planting, loosen the soil with a garden fork or tiller to a depth of about 8 inches. This will allow the pea roots to penetrate the soil more easily.
Once your soil is well-prepared, you’re ready to plant your peas. Remember, good soil preparation is half the battle in growing a successful garden. Your peas will thank you!
If you have poor garden soil, limited space, or only have a balcony, don’t sweat it. Most pea varieties don’t reach over 48″ in height making them ideal for growing in containers or grow bags.
Planting Peas Seeds
Once you’ve chosen your pea variety, prepared your soil, and decided on the perfect time for planting, it’s time to actually plant your pea seeds. Follow these steps for successful planting:
Seed Soaking: While not absolutely necessary, soaking your pea seeds for a few hours or overnight can speed up germination. Just place the seeds in a bowl of water and let them sit.
The seeds will absorb water, swelling in size and jumpstarting the germination process.
Seed Spacing: Space your seeds about 1 to 2 inches apart. This allows enough room for each plant to grow without crowding, but close enough for the plants to support each other.
Planting Depth: Plant the seeds about 1 to 1.5 inches deep. If your soil is heavier or it’s still quite cool, plant a bit shallower. If it’s lighter or warmer, plant a bit deeper.
Row Spacing: If you’re planting multiple rows of peas, leave about 18 to 24 inches between rows. This leaves room for airflow and sunlight to reach all plants.
Watering: After planting, water the area thoroughly. Then keep the soil consistently moist (but not soggy) until germination occurs, which is usually within 7 to 14 days, depending on soil temperature.
Succession Planting: If you want a continuous harvest, consider planting new seeds every two weeks while the weather remains cool.
Peas have a bit of a rivalry with birds and mice, so consider using a seedling mesh or net to protect your precious peas until they germinate.
Caring for Pea Plants
Another important aspect when you grow peas from seed is continuing care. Once your peas have sprouted and begun to grow, they’ll need some ongoing care to ensure they thrive and produce a healthy harvest.
Here are the key aspects to consider:
Watering: Pea plants like a moderately moist soil. Water them thoroughly at planting and then regularly throughout their growth, aiming for about an inch of water per week, including rainfall. Over-watering can cause root rot and other issues, so let the soil dry out slightly between waterings.
Remember, it’s better to water deeply less frequently, than to give your plants a little water often.
Mulching: A good layer of organic mulch can do wonders for your pea plants. Mulch helps conserve soil moisture, suppress weeds, and regulate soil temperature. Use compost, straw, or shredded leaves, laying it around the base of the plants but not touching the stems.
Support: Many pea varieties are climbers and will need some support as they grow. They will wrap their thin tendrils around the support you provide as they climb. A trellis, netting, or even a few twigs from your garden can work as a support system.
If you’re growing a bush variety, they’ll still appreciate some support to keep them off the ground.
Fertilizing: Peas are light feeders and don’t usually require much fertilization. In fact, they’re capable of ‘fixing’ their own nitrogen from the air, which helps them grow. However, they appreciate a bit of compost or a balanced organic fertilizer at planting time to give them a good start.
Common Pests and Diseases
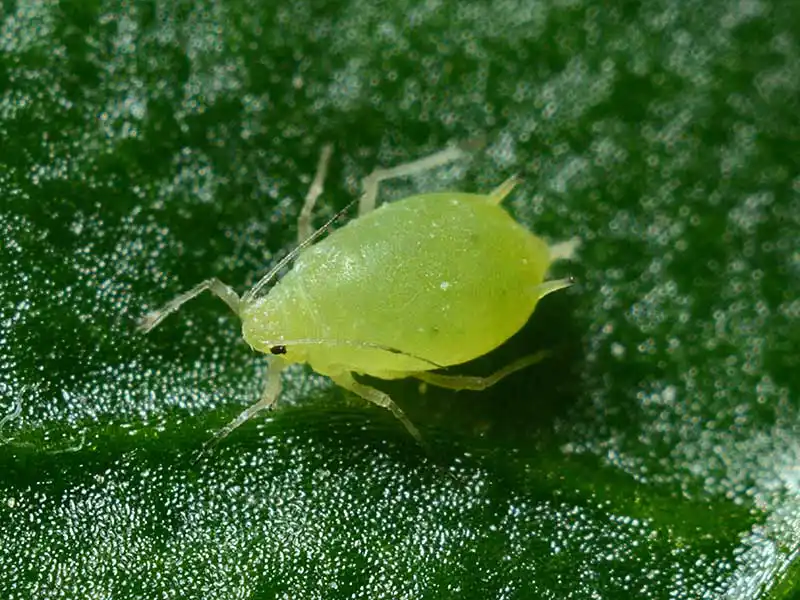
Alright, let’s talk about the “bad guys”. Pea plants can be affected by various pests like aphids and diseases like powdery mildew. But don’t worry, I’ve got your back!
| Pests/Diseases | Symptoms | Organic Control Measures |
|---|---|---|
| Aphids | Yellowing, curling leaves, sticky residue | Insecticidal soap, neem oil |
| Powdery Mildew | White, powdery patches on leaves | Ensure proper air circulation, consider organic fungicides |
| Pea Weevil | Notches in leaf edges, stunted growth | Crop rotation, hand-picking |
Regularly inspect your plants and use organic pest control methods. More information about pea pests and diseases.
Harvesting and Storing Peas

Harvesting peas is one of the most rewarding aspects when you grow peas from seed. The timing is essential – too early, and the peas will be underdeveloped; too late, and they may be tough and starchy.
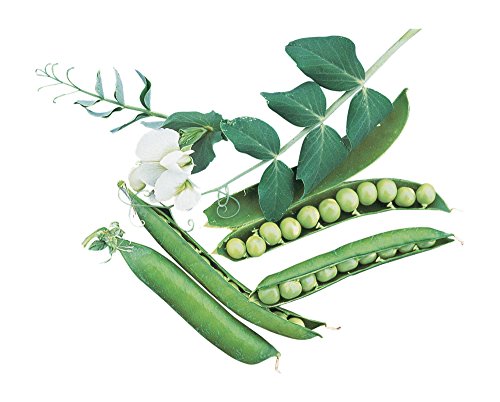
Peas are ready for picking when the pods are plump and feel full. The pods should be bright green and firm. The exact timing will depend on the variety of pea you’re growing, so it’s a good idea to consult the seed packet or a reliable gardening guide.
Harvesting Tip: Use two hands to harvest: one to hold the vine, the other to pick the pod. This way, you can avoid damaging the plant, which could affect its ability to produce more pods.
Freshly picked peas are a real treat and are best consumed as soon as possible after harvesting, as their sweetness starts to turn into starch. However, if you can’t consume all your peas fresh, there are a few ways you can store them.
Refrigerating: Shelled peas can be stored in the refrigerator for about a week. Store them in a breathable bag or a container with a lid to keep them fresh. If you’re storing whole pods, they may last a bit longer.
Freezing: Peas freeze well, and this is an excellent way to preserve their flavor.
To freeze peas, you should first blanch them – this involves briefly boiling them and then plunging them into ice water to stop the cooking process.
Once blanched, you can spread them out on a baking sheet to freeze them quickly and then transfer them to airtight bags or containers for long-term storage.
Drying: Another way to store peas is to dry them. This is particularly suitable for peas that you’ve allowed to mature fully on the vine and have become starchy. Dried peas can be rehydrated and used in soups and stews, much like split peas.
Remember, the best tasting peas are the ones eaten straight from the garden, but with these storage methods, you can enjoy your pea harvest for months to come.
Saving Seeds for Next Planting Season
Preserving your own pea seeds for the next growing season can be a gratifying and cost-effective gardening practice.
To do this, you need to allow some of your healthiest pea plants to mature fully. This means leaving the pods on the plant until they’re dry and brittle, usually a few weeks after you would normally harvest them for eating.
The best seeds come from the healthiest plants, so select robust, disease-free plants. Wait until the pods are fully mature and starting to dry out before you harvest seeds.
Once the pods are dry, you can harvest them and remove the dried peas. Store them in a cool, dry place until the next planting season. Remember to label your saved seeds with the variety and the date, as pea seeds can look quite similar and it’s easy to forget what you’ve saved!
Conclusion
And there you have it – your crash course on how to grow peas from seed! From choosing your variety to sowing, caring, and finally harvesting, each step brings its own joy.
The thrill of seeing the first shoots emerge from the soil, the satisfaction of a healthy plant climbing up a trellis, and the simple pleasure of shelling your own peas – these are moments to savor. So why not give it a go? You might find you have quite the knack for it!
FAQ: Grow Peas from Seed
What temperature is too hot for peas?
Peas prefer cooler weather. Temperatures above 85°F (29°C) can inhibit their growth and cause them to stop producing pods.
How many peas do you plant per hole?
Generally, it’s best to plant 1-2 pea seeds per hole. If both germinate, they’ll provide support to each other as they grow.
Do pea seeds need to be soaked before planting?
Soaking pea seeds before planting can hasten germination. However, it’s not mandatory. If you do soak, a few hours up to overnight is sufficient.
What should not be planted near peas?
Avoid planting peas near onions or garlic. These plants can inhibit the growth of peas due to their strong odors and different nutrient needs.
Why won’t my peas germinate?
Pea seeds may fail to germinate if the soil is too cold or too wet. They could also be too old or have been damaged by pests. Try planting fresh seeds in well-drained soil at the correct temperature.


