You’ve harvested your peppers, you love the variety, why not save some seeds to grow the following season? In this article we’ll go through the steps on how to save pepper seeds for next year.
Choosing The Right Pepper
Open Pollinated vs. Hybrid
The first thing you should consider is whether the pepper variety is open pollinated or hybrid. If you grew the pepper plant from seed, take look at the original seed packet. It should have been labeled as “Hybrid” or “F1” to indicate a hybrid variety.
A quick Google search wouldn’t be a bad idea either just in case. If the pepper plant you want to save seeds from is open pollinated, or at least not hybrid, then you can save seeds. If the pepper plant is a hybrid, generally you shouldn’t bother saving seeds as they won’t grow true to the original variety.
Is The Pepper Fully Mature?
Now that you’ve determined that your plant is not a hybrid, choosing the right pepper to save seeds from is pretty simple. Make sure the pepper is fully ripe before harvesting. Most peppers will turn some color other than green when fully mature. Even green Bell peppers, Serranos or Jalapenos will ripen to red at maturity.
We like to leave our chosen peppers on the plant until the fruit starts to soften a bit after changing to its final color stage. However, don’t wait too long or the seeds could start to mold inside the pepper. Seeds inside the fruit from most pepper varieties should be light cream colored, not brown or black.
Isolated Seeds
Of note, if you grew more than one variety of pepper plants in your garden there is a possibility that they cross pollinated. You can eliminate these concerns by isolating fruit from the plant from which you want to save pepper seeds for next year. Be sure and check out our guide on how to isolate peppers for seed saving.
On to the next step…
Remove The Seeds To Save For Next Year
Start by cutting off the bottom third if the peppers are long, such as the Maule’s Red Hot pepper. Any seeds found in the lower part will have less viability anyway. You can also cut the stem end off of the pepper.
Do this just below where the stem meets the meat of the pepper. Now take your knife and cut the pepper open lengthwise and split the fruit open. Round peppers, such as Alma Paprika pepper, can simply be cut in half. If the peppers are a hot variety, we recommend wearing gloves for the seed collection process.
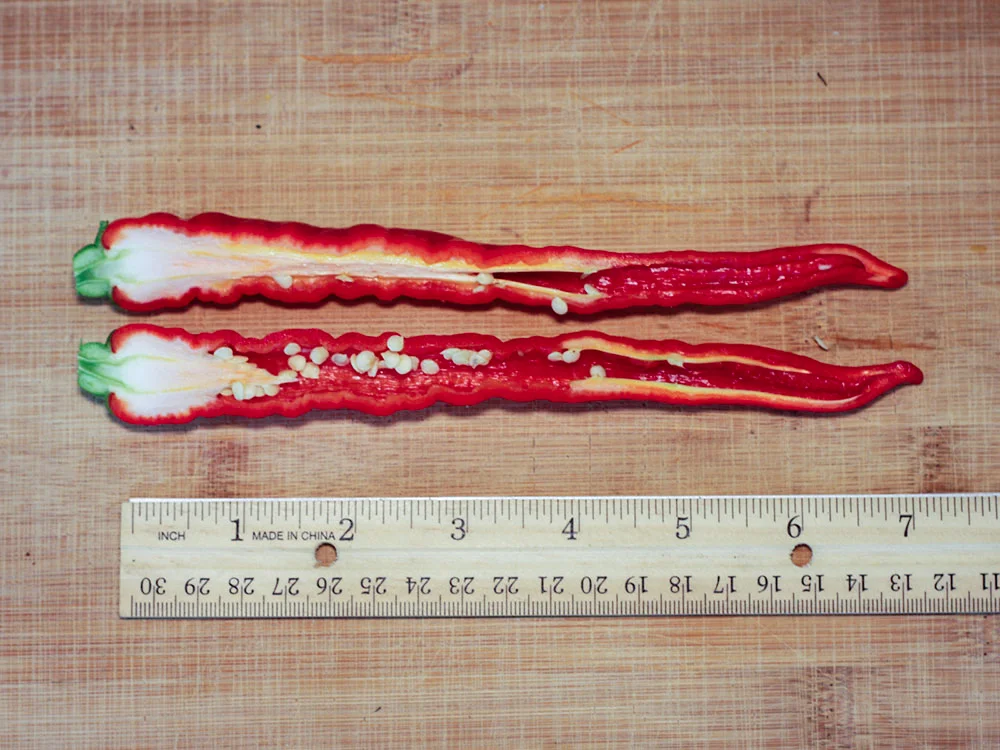
Some pepper types have a large cluster of seeds and others will have only a few running down the pith. Either way, just scrape or pinch out the seeds onto a plate, coffee filter or cutting board. The less flesh and pith that gets removed with the seeds the better. Once all the seeds have been removed, rake them into a pile and try to separate any seeds that are attached to each other or pith.
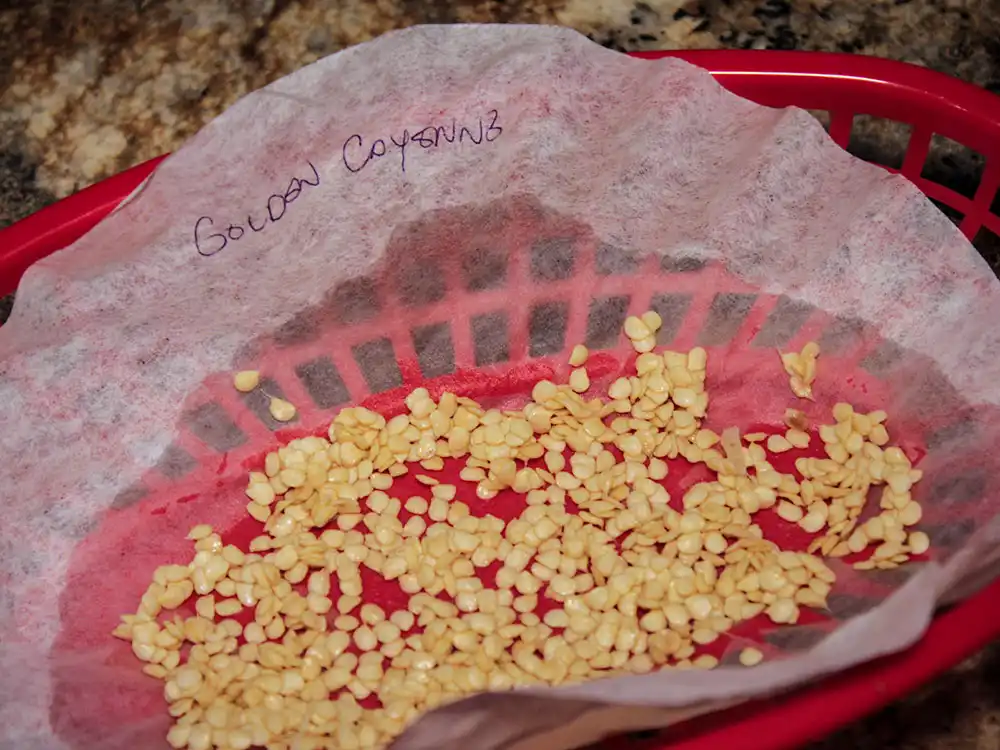
You can also remove any brown seeds or seeds with a brown center. Seeds with a brown center (see photo below) have already started germinating inside the pepper, are non-viable, and will not sprout the following year.

Cleaning The Seeds
When saving pepper seeds for next year we recommend cleaning them first. This isn’t hard and, in the process, you’ll be able to weed out some non-viable seeds. To do this you’ll need a small fine mesh strainer and a deep glass or other vessel.
Start by putting all the seeds in a tall glass. Now slowly fill the glass close to the top with water. You should notice that most seeds will immediately sink to the bottom. Those are your viable seeds. You’ll also notice that some seeds float. There are various reasons for this to happen. Some may be buoyant because they’re attached to a small piece of flesh, some may have a small air bubble attached to them, and others are non-viable seeds.
Using a spoon, give the water a little stir. Allow to settle for a couple minutes, and then use the spoon to try and submerge any floating seeds. In the photo above you can see the floating seeds, many of which have that dark center mentioned earlier.

Eliminate Non-Viable Seeds
Seeds that don’t have any flesh attached to them and still insist on floating should be strained off. You can do this by slowly pouring water out of the glass. We pour them off into the strainer for this so as not to clog up our plumbing with seeds.
The floaters and small pieces of pulp will pour out with the water and the submerged seeds will remain in the glass. We recommend refilling the glass with water and repeating this process a few times. Some of the non-viable seeds may have been dragged to the bottom. Simply discard the floaters and pulp you strained off.

Food for thought
We have had a couple varieties of pepper that all the seeds float, even from fully mature fruit. An example of this is the Dragon Toe pepper seeds. For some unknown reason they all floated. In order to verify their viability, we simply performed a germination test.
Save Pepper Seeds For Next Year – Drying The Seeds
Now that you’ve eliminated as many non-viable seeds and pulp as possible, it’s time to dry the seeds. Refill the vessel containing the viable seeds, the seeds that didn’t float, with water. Now pour the seeds into the fine mesh strainer.
Rinse the glass with water and pour into the strainer to ensure you get all the seeds out. We like to give an extra rinse to the seeds at this time as well, swirling the seeds around in the strainer under running water.
Once the seeds are well rinsed it’s time to put them on something to dry. It’s important that the seeds dry as quickly as possible so the germination process doesn’t start prematurely. Many people like to use a paper plate to dry the seeds. However, we’ve found that the best method is using coffee filters which are great for wicking away water as they dry very quickly.
Paper plates tend to stay wet longer and, in our experience, the dried seeds tend to stick to them.
Seeds dried in coffee filters dry quickly and pour cleanly out of the filters with no fuss. Coffee filters are also very inexpensive compared to paper plates and can be reused several times.
Storage – Save Seeds For Next Year
Write the pepper variety on the upper lip of a coffee filter and pour the seeds onto it. Spread the seeds out. Try to get them into a single layer as much as possible. Stir the seeds up after a few hours then smooth to a single layer again to ensure they dry evenly. Then leave the seeds to dry on the coffee filter for a couple days in a well-ventilated, cool, dark place.
Basements are often damp and not an ideal place to dry seeds. Once the seeds are thoroughly dry, they can be sealed in an airtight container or bags to ensure they stay dry. We prefer using these foil lined zipper pouches for seed storage. They’re inexpensive, lightproof, waterproof, and seal tightly.
Germination Testing Pepper Seeds

One last thing you may want to do before storing away the seeds is to perform a germination test commonly known as the paper towel method. Do this test with seeds that were fully dried after cleaning. Simply take a few seeds and place them in a folded barely damp paper towel. If the paper towel is too wet the seeds will mold quickly.
So when I say barely wet, I mean barely wet. Squeeze every drop of water out of the paper towel that you can before placing seeds on it.
Then seal the paper towel in a Ziplock bag, no extra air, and put it in a warm, dark place. After about a week, sometimes two, you should see little sprouts emerging from the seeds (photo above). If you tested ten seeds and 9 germinate, you have a 90% germination rate. Knowing the germination rate will help you determine how many seeds to sow the following spring to ensure you get as many seedlings as you’ll need for your garden.
Conclusion
We hope this helps with your venture to save pepper seeds for next year. If you have any questions, feel free to post them in the comment section of send us a message using the contact form. Happy gardening!