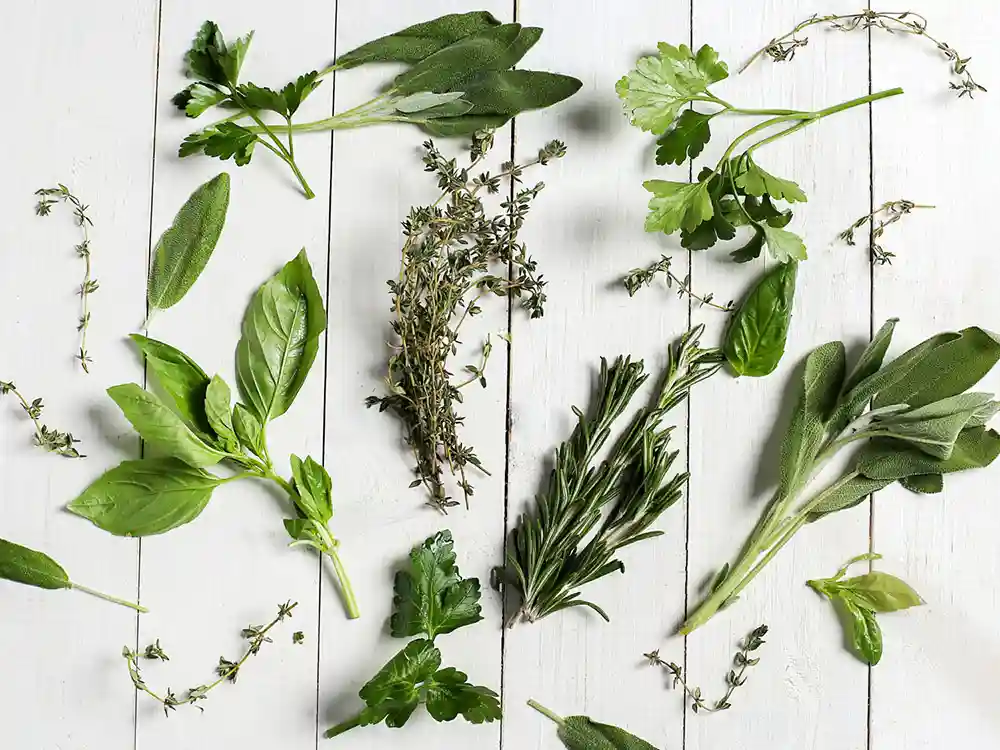
Are you looking to add a burst of flavor to your culinary creations? Look no further than chives! In this guide, we’ll cover everything you need to know about how to grow chives successfully, from choosing the right variety to harvesting and dealing with common problems. So, let’s dig in and get started!
I always love experimenting with different herbs in my garden. One herb that I absolutely adore is chives. These versatile and delicious herbs are a must-have for any herb garden.
Their mild onion flavor adds a burst of freshness to my salads, soups, and even scrambled eggs. Over the years, I’ve learned a thing or two about how to grow chives successfully, and I’m excited to share my tips with you in this article.
Basic Info
| Common Name: | Chives |
|---|---|
| Scientific Name: | Allium schoenoprasum |
| Days to Harvest: | 60-90 days |
| Light: | Full sun to partial shade |
| Soil: | Well-draining, fertile soil |
| Water: | Regular, even moisture |
| Fertilizer: | Organic matter-rich, balanced fertilizer |
| Pests: | Aphids, thrips |
| Diseases: | Fusarium wilt, leaf spot |
Best Varieties
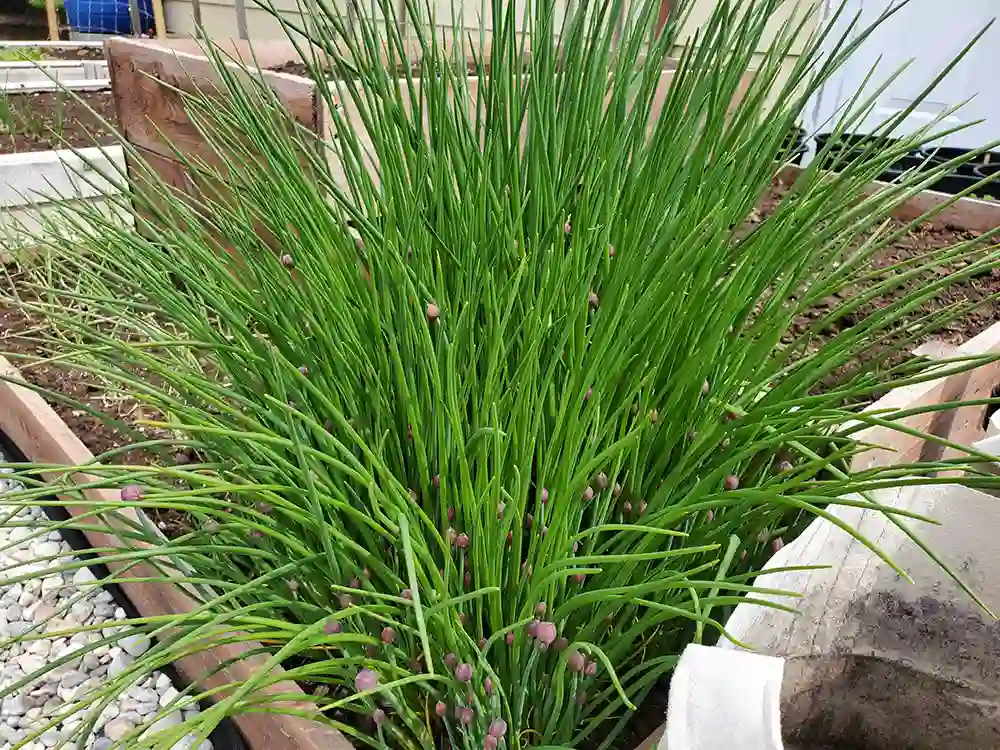
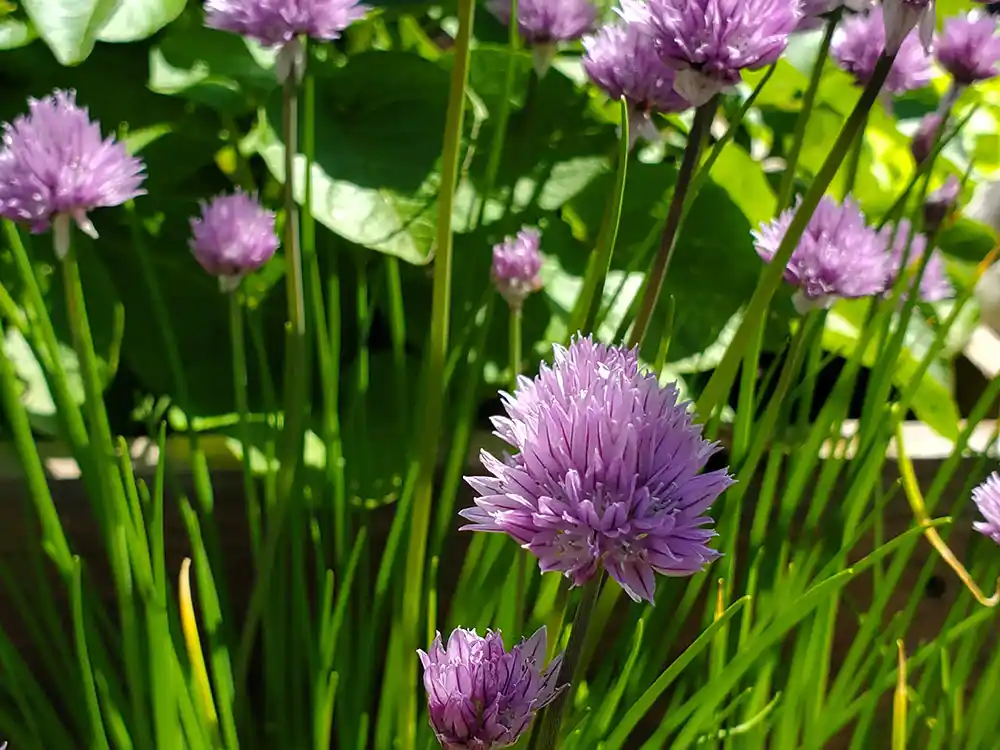
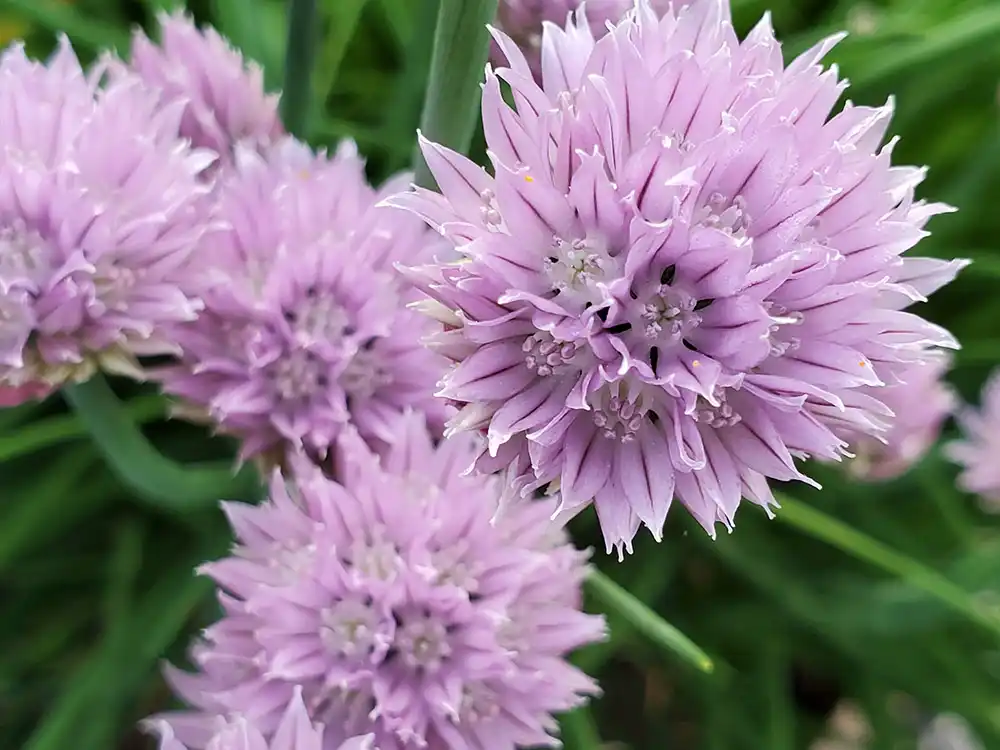
When it comes to chives, there are two main types to choose from: common chives (Allium schoenoprasum) and garlic chives (Allium tuberosum). Common chives have slender, hollow leaves and produce beautiful purple flowers, while garlic chives have flat, broader leaves and produce white flowers.
Both varieties are equally delicious and can be used in various culinary applications, so the choice ultimately comes down to personal preference.
Choosing the Right Variety
If you’re a beginner gardener or it’s your first attempt to grow chives, common chives are usually the recommended choice. They are hardy, easy to grow, and readily available in most garden centers. Common chives are also a great option if you’re looking for a plant that can tolerate colder climates, as they are known to be more cold-tolerant compared to garlic chives.
On the other hand, if you’re a more experienced gardener or want to experiment with different flavors in your cooking, garlic chives may be the right choice for you. Garlic chives have a milder garlic flavor and are a great addition to Asian-inspired dishes. Whichever variety you choose, you’re in for a treat!
How To Grow Chives From Seed
When it comes to growing chives, you have two options: starting seeds indoors or sowing them directly outdoors. Let’s take a closer look at both methods.
Start Chive from Seed Indoors
If you live in an area with a short growing season or want to get a head start on your chive garden, starting seeds indoors is a great option. Here’s how you can do it:
- Fill a seed tray or small pots with a seed starting mix. You can find this mix at most garden centers or make your own by combining equal parts of peat moss, vermiculite, and perlite.
- Sow the chive seeds on the surface of the seed starting mix, spacing them about 1 inch apart.
- Lightly cover the seeds with a thin layer of seed starting mix, and water gently.
- Place the tray or pots in a sunny location or under a grow light, and keep the soil evenly moist but not waterlogged.
- Once the seedlings have developed their first true leaves, which usually takes about 2-3 weeks, you can transplant them into individual pots or a larger container with well-draining potting soil.
- Continue to care for the seedlings indoors until the danger of frost has passed and they are large enough to be transplanted outdoors.
No products found.
Hardening Off
Before transplanting your chive seedlings outdoors, it’s important to harden them off to acclimate them to the outdoor conditions. This process helps prevent transplant shock and ensures a successful transition from indoor to outdoor growing. Here’s how you can do it:
- Gradually expose the chive seedlings to outdoor conditions over the course of several days, starting with a few hours of sunlight and gradually increasing the exposure each day.
- Make sure to protect the seedlings from strong winds and direct sunlight during the hardening off process to prevent them from drying out or getting sunburned.
- After about a week of hardening off, your chive seedlings should be ready to transplant outdoors.
Related Post: If you’re interested in this article, maybe you’d like to learn how to grow chive in pots
Grow Chives From Seed Outdoors
If you prefer to sow chive seeds directly outdoors, you can do so in early spring or fall, depending on your climate. Here’s how you can sow chive seeds directly in your garden:
- Choose a sunny spot in your garden with well-draining soil. Chives prefer slightly alkaline soil with a pH of 6.0 to 7.0.
- Loosen the soil with a garden fork or tiller to a depth of about 6 to 8 inches.
- Sow the chive seeds on the surface of the soil, spacing them about 1 inch apart.
- Lightly cover the seeds with a thin layer of soil, and water gently.
- Keep the soil evenly moist, but not waterlogged, until the seedlings emerge, which usually takes about 2 to 3 weeks.
- Once the seedlings have developed their first true leaves, thin them out, leaving about 6 to 8 inches between each plant to allow for proper air circulation and growth.
Propagation: Grow Chives Through Division
Dividing chives is a simple and effective way to propagate and expand your chive patch. Here’s a step-by-step guide on how to divide chives:
- Choose the right time: The best time to divide chives is in early spring or fall when the plants are dormant.
- Prepare the plants: Carefully dig up the clumps of chive plants using a shovel or fork, being mindful not to damage the roots.
- Separate the clumps: Gently separate the clumps into smaller sections, making sure each section has its own roots and shoots. You can do this by carefully pulling apart the clumps with your hands or using a sharp knife or garden shears.
- Trim the foliage: Trim the foliage of the divided chive plants to about 4-6 inches in length. This will help reduce stress on the plants and promote healthy growth.
- Plant the divisions: Plant the divided chive sections in well-draining soil, spacing them about 6-12 inches apart. Plant them at the same depth as they were previously growing, with the roots buried and the shoots above the soil surface.
- Water and care for the divisions: Water the newly planted chive divisions thoroughly and keep the soil evenly moist but not waterlogged. Provide them with adequate sunlight (about 6 hours of direct sunlight per day) and protect them from extreme weather conditions.
- Regular maintenance: Continue to care for the divided chive plants as you would with established chives, including regular watering, fertilizing, and weeding. They should start growing and establishing themselves in their new location within a few weeks.
Dividing chives is a straightforward process that can be done with minimal effort, and it’s a great way to propagate chives and create more plants to enjoy in your garden or share with others.
When to Plant
The ideal time to plant chives depends on your climate and the growing season of your region. In general, chives can be planted in early spring or fall, as they prefer cooler temperatures. If you live in a region with mild winters, you can also plant chives in late winter or early fall for a continuous harvest throughout the year. Avoid planting chives in the hot summer months, as they may wilt or bolt due to the high temperatures.
Care and Maintenance
Taking care of your chive plants is relatively easy, and with a little attention, they will thrive in your garden. Here are some key care and maintenance tips for growing healthy chives:
Selecting the Right Location
Chives prefer a sunny location with well-draining soil. Choose a spot in your garden that receives at least 6 hours of direct sunlight per day. Avoid planting chives in areas with heavy clay soil or where water tends to pool, as this can cause root rot. It’s also important to provide adequate air circulation around the plants, so avoid overcrowding them with other plants.
Ideal Soil to Grow Chives
Chives prefer slightly alkaline soil with a pH of 6.0 to 7.0. If your soil is acidic, you can add lime or wood ash to raise the pH. It’s also a good idea to enrich the soil with organic matter, such as compost or well-rotted manure, to improve fertility and drainage. Before planting, loosen the soil with a garden fork or tiller to a depth of about 6 to 8 inches to ensure the roots can penetrate easily.
Watering Needs
Chives prefer evenly moist soil, but they don’t like to be waterlogged. Overwatering can cause the roots to rot, so it’s important to water chives judiciously. Water your chives when the top inch of soil feels dry to the touch, usually about once a week. Avoid overhead watering, as it can encourage the growth of fungal diseases. Instead, water at the base of the plants to keep the foliage dry.
Fertilizer Used to Grow Chives
Chives are relatively low-maintenance plants and don’t require heavy fertilization. However, you can give them a boost with a balanced, water soluble fertilizer, such as a 10-10-10 or 14-14-14 formula, in early spring and again in mid-summer. Follow the manufacturer’s instructions for application rates, as over-fertilization can cause the plants to produce more foliage and fewer flowers.
Harvesting and Storage

One of the best things about growing chives is that you can start harvesting them as soon as they are about 6 inches tall, typically about 60 to 80 days after planting. Here’s how you can harvest chives:
- Use clean, sharp scissors or pruning shears to cut the chive leaves at the base, leaving about 2 inches of the plant above the soil level.
- Avoid cutting more than one-third of the plant at a time, as this can weaken the plant and slow down its growth.
- Harvest chives regularly to encourage bushier growth and continuous production of fresh leaves.
- You can also harvest the chive flowers, which are edible and have a milder flavor compared to the leaves. Simply snip off the flower heads before they fully open and use them as a garnish or in salads.
Dry Chives for Storage
Harvested chives can be used fresh or dried for later use. To dry chives, simply tie them in small bundles and hang them in a warm, well-ventilated area until they are fully dry. Once dried, store them in an airtight container in a cool, dry place.
Common Problems When You Grow Chives
Here’s a table summarizing common pests and diseases that can affect chives, their symptoms, and recommended treatments:
| Pests | Treatment |
|---|---|
| Thrips | Use neem oil or insecticidal soap, and remove heavily infested parts |
| Damping-off | Plant in well-draining areas and do not overcrowd plants |
| Pink root | Plant resistant varieties, destroy infected plants |
Here’s an in-depth article about chive pests and diseases if you need more info.
Tips on Maximizing Chive Growth
Here are some additional tips to help you grow chives and maximize the yield:
- Mulch around chive plants with a layer of organic matter, such as straw or chopped leaves, to help retain moisture and suppress weeds.
- Pinch back the tips of chive plants regularly to encourage bushier growth and prevent them from becoming leggy.
- Divide chive clumps every 2 to 3 years to maintain vigorous growth. Simply dig up the clump, separate it into smaller sections, and replant them.
- Avoid using chemical pesticides or herbicides on or near chive plants, as they can harm beneficial insects that help control pests.
Conclusion
Chives are a versatile and easy-to-grow herb that can add flavor and beauty to your garden. Remember to choose the right variety that suits your gardening needs, start seeds indoors for an early start, transplant seedlings outdoors after hardening off, plant in well-draining soil with good moisture retention, water and fertilize appropriately, and harvest regularly for continuous growth.
If you encounter common problems such as pests or diseases, take proactive measures to control them using organic methods whenever possible to avoid harm to beneficial insects and the environment. Additionally, implement tips such as mulching, pinching back, dividing clumps, avoiding chemicals, and encouraging pollinators to maximize the yield and growth of your chives.
We hope this article has provided you with valuable insights on how to grow chives successfully in your garden. With a little care and attention, you can enjoy the fresh and flavorful taste of chives in your culinary creations. Don’t hesitate to share your own gardening tips and experiences about growing chives in the comments section below. Happy gardening!
FAQ: How To Grow Chives
Do chives keep growing after you cut them?
Yes, chives are perennial herbs that continue to grow after you cut them. Regular harvesting actually encourages chive plants to produce new growth and promotes bushier, healthier plants.
Is it OK to let chives flower?
While chive flowers are edible and can add a burst of color to your garden, allowing chives to flower can divert energy from foliage growth. It’s generally recommended to snip off the flower heads to encourage more foliage growth and prevent self-seeding.
How many years do chives come back?
Chives are perennial herbs, which means they can come back year after year in the right growing conditions. With proper care, chives can last for many years in your garden, providing a fresh and flavorful herb to enjoy in your cooking.
Can I grow chives in pots?
Yes, chives can be grown in pots or containers, making them suitable for small gardens, balconies, or indoor gardens. Choose a well-draining potting mix, provide adequate sunlight, and water regularly to grow healthy chives in pots.
Do chives multiply?
Yes, chives can multiply and form clumps over time. They often spread through their underground rhizomes, forming dense patches. This can be managed by dividing and transplanting the clumps, as mentioned earlier in the article, to prevent overcrowding and promote healthier growth. Chives also spread by dropping seeds. To prevent the chives from spreading by seeds, remove flowers as they appear.