Are you a tomato lover who wants to grow your own juicy, flavorful tomatoes year after year? Then you’re in luck! One of the most rewarding and cost-effective ways to grow tomatoes is by saving the seeds from your own ripe tomatoes. In this article, we’ll walk you through the process of how to save tomato seeds, step by step, so you can enjoy a bountiful harvest of your favorite tomatoes for years to come!
Why Save Tomato Seeds?
Saving tomato seeds has been a long-standing tradition for many home gardeners. Not only is it a fun and sustainable gardening practice, but it also allows you to select and propagate the best plants from your own garden.
Saving tomato seeds also allows you to preserve the unique characteristics of a specific tomato variety, and saves you money on buying new seeds each year.
Additionally, by saving tomato seeds, you can help to promote seed diversity and preserve heirloom or rare tomato varieties that may not be readily available in commercial seed catalogs.
It’s a great way to be self-sufficient in your gardening endeavors and have a sense of pride in growing your own tomatoes from seed to fruit!
Heirloom vs Hybrid Tomatoes
When it comes to saving tomato seeds, understanding the difference between heirloom and hybrid tomatoes is important. Here’s a breakdown of the two types:
Heirloom: Save these Tomato Seeds
Heirloom tomatoes are open-pollinated tomatoes that have been passed down through generations and are known for their unique flavors, colors, and shapes.
They are pollinated by natural means such as wind, insects, or birds, or self-pollination resulting in seeds that produce plants that are similar to the parent plant. Heirlooms come in many varieties from cherry tomatoes to beefsteak tomatoes.
Saving seeds from heirloom tomatoes is relatively straightforward, as they are true-to-type and will produce offspring with similar characteristics as the parent plant.
Heirloom tomatoes are often considered more genetically diverse and can exhibit a wide range of flavors, colors, and shapes, making them popular among gardeners who value diversity in their tomato crops.
These are the varieties from which you should save tomato seeds.

Hybrid: Do Not Save these Tomato Seeds
Hybrid tomatoes, on the other hand, are the result of crossbreeding between different tomato varieties to create offspring with specific desired traits, such as disease resistance, higher yield, or uniform size and shape.
They are often labeled as “F1” or “Hybrid” with trade names, such as “Big Boy” or “Early Girl,” and their seeds are typically produced through controlled pollination techniques.
Due to the crossbreeding of different tomato varieties, seeds saved from hybrid tomatoes may not produce plants that are true-to-type. This means that the offspring may not exhibit the same traits as the parent plant, and the resulting tomatoes may not have the same flavor, color, or shape as the original hybrid tomato.
While it is possible to save seeds from hybrid tomatoes, the resulting plants may not always produce tomatoes with the desired traits that were present in the original hybrid tomato.
Therefore, if you are interested in saving tomato seeds for future planting, it is generally recommended to focus on heirloom or open-pollinated varieties to ensure that you are saving seeds that will produce true-to-type plants.
What You’ll Need To Save Tomato Seeds
Before we dive into the process of saving tomato seeds, let’s gather some supplies. You’ll need:
- Ripe tomatoes: Choose healthy, fully ripe tomatoes from the healthiest and most vigorous plants in your garden. Make sure they are fully mature and have been on the vine for at least 2-3 weeks after reaching full color. Avoid using overripe or diseased tomatoes, as they may produce weak or unhealthy seeds.
- Knife or spoon: You’ll need a knife or a spoon to scoop out the seeds from the tomatoes.
- Paper towels, paper plates or coffee filters: You’ll need something to put the seeds on while drying. We recommend coffee filters; the seeds won’t stick to them.
- Mason jars or other glass container: You’ll need a glass container to ferment the seeds.
- Marker or labels: It’s important to label your seeds with the tomato variety, the date of collection, and any other relevant information. Use a marker or labels to keep track of your saved seeds.
Now that you’ve gathered your supplies, let’s dive into the step-by-step process of how to save tomato seeds!
Choose Ripe Tomatoes
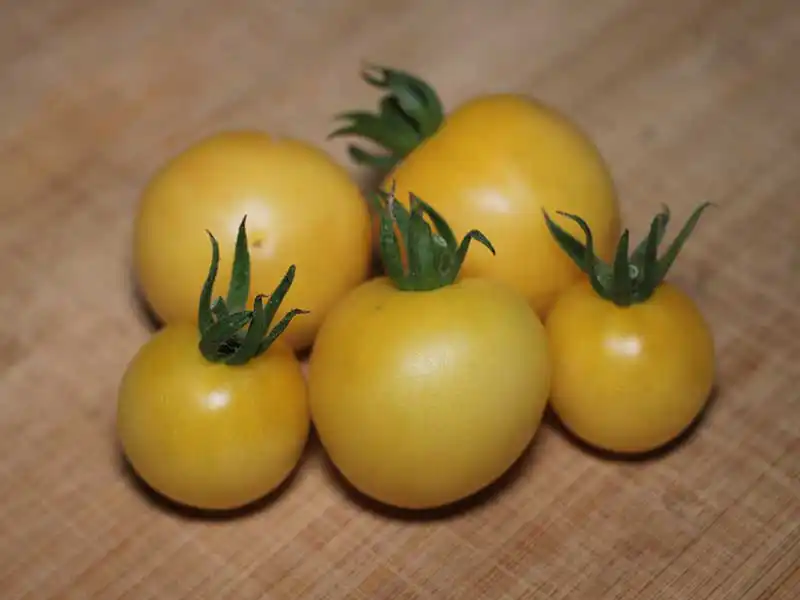
The first step in saving tomato seeds is to choose ripe tomatoes. Look for healthy, fully ripe tomatoes that are free from any signs of disease or pests. Choose the best-looking tomatoes from the healthiest and most vigorous plants in your garden.
The key is to select tomatoes that are fully mature and have been on the vine for at least 2-3 weeks after reaching full color. This ensures that the seeds inside the tomatoes are fully developed and viable for germination.
Personal Tip: Save Tomato Seeds from Your Favorites
When choosing tomatoes to save seeds from, I always go for my favorite varieties. I love the sweet, juicy flavor of Brandywine tomatoes, so I make sure to save seeds from the best Brandywine tomatoes in my garden each year. I’m also sure to save Cherokee Purple tomato seeds, another favorite of mine.
By saving seeds from your favorite tomatoes, you can ensure that you’ll have a fresh supply of your beloved tomatoes for years to come!
Save Tomato Seeds Using the Fermentation Method
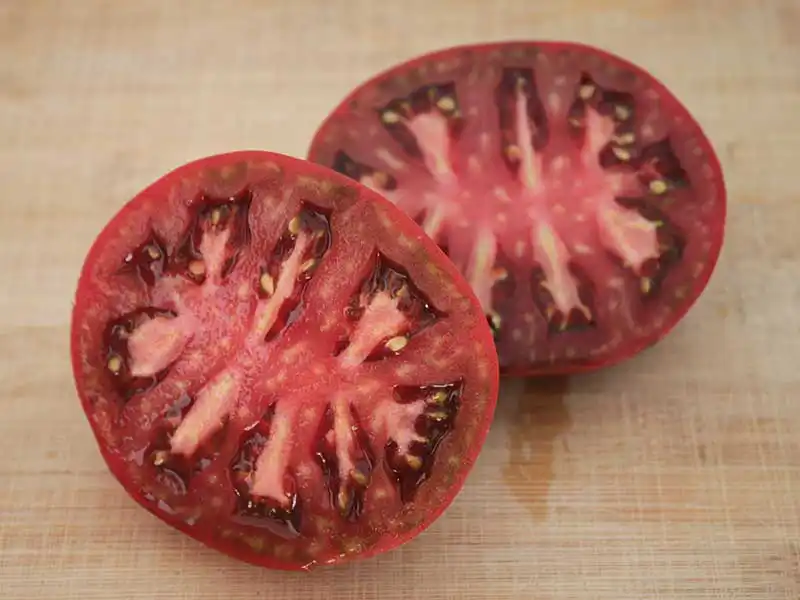
The fermentation method is the most common and widely used method for saving tomato seeds. It mimics the natural process of fermentation that occurs when a tomato falls to the ground and decomposes, leaving the seeds to ferment and then germinate in the wild.
Here’s how to save tomato seeds using the fermentation method:
Collect the Tomato Seeds
Cut the tomato in half and scoop out the seeds, along with the surrounding gel, into a clean glass jar. You can use a spoon or your fingers to gently squeeze the seeds and gel out.
Add a small amount of water to the jar, enough to cover the seeds and gel. The water helps to initiate the fermentation process by breaking down the gel and separating the seeds.
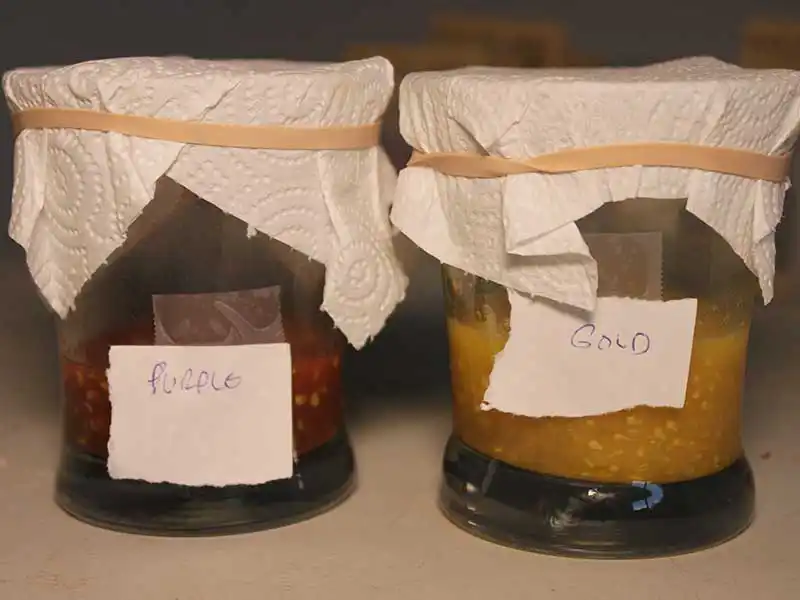
Cover the jar with a piece of cheesecloth, paper towel, or a coffee filter and secure it with a rubber band. This allows air to circulate while keeping out dust and insects.
Fermenting the Tomato Seeds
Place the jar in a warm, well-ventilated area away from direct sunlight. Ideally, the temperature should be between 70-80°F (21-27°C). Leave the jar undisturbed for 2-3 days, stirring the contents once or twice a day.
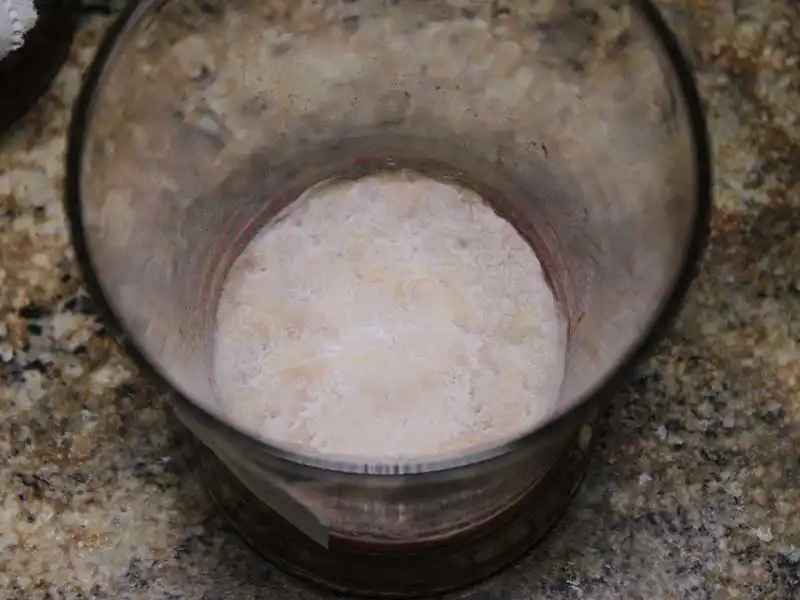
After a few days, you’ll start to see some mold forming on the surface of the water. This is a good sign that the fermentation process is working. The mold helps to break down the gel and separate the seeds from it.
Clean the Tomato Seeds
Once the fermentation is complete, the seeds will sink to the bottom of the jar, and the mold will have formed a layer on top. Stir the mold with a spoon too break it up into smaller pieces and dislodge any seeds. Be warned, the contents are going to be pretty stinky!
Pour the contents into a tall narrow vessel, such as a drinking glass, for this step. Then fill the vessel to the top with water. The mold and undesirables will float and the viable seeds will sink to the bottom. Carefully begin to carefully pour off the mold and any floating seeds. Refill the glass and repeat this process as many times as necessary to remove the mold.

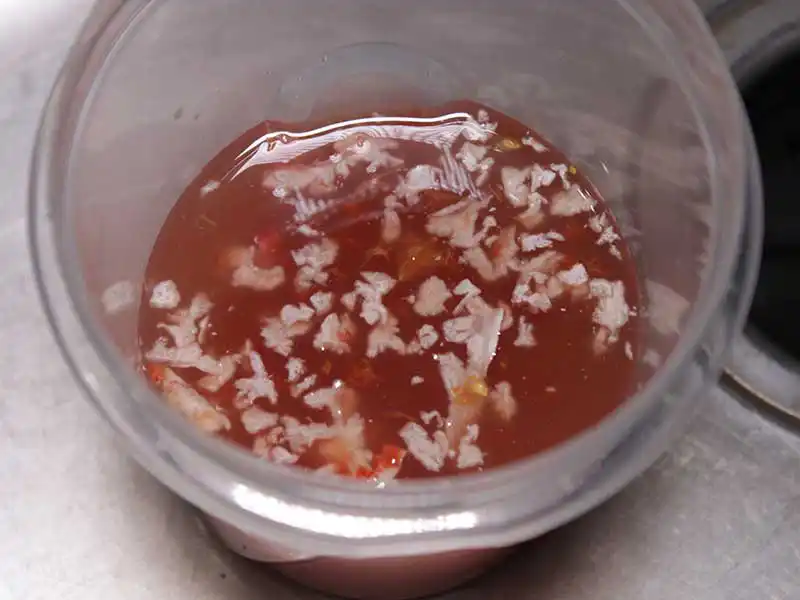
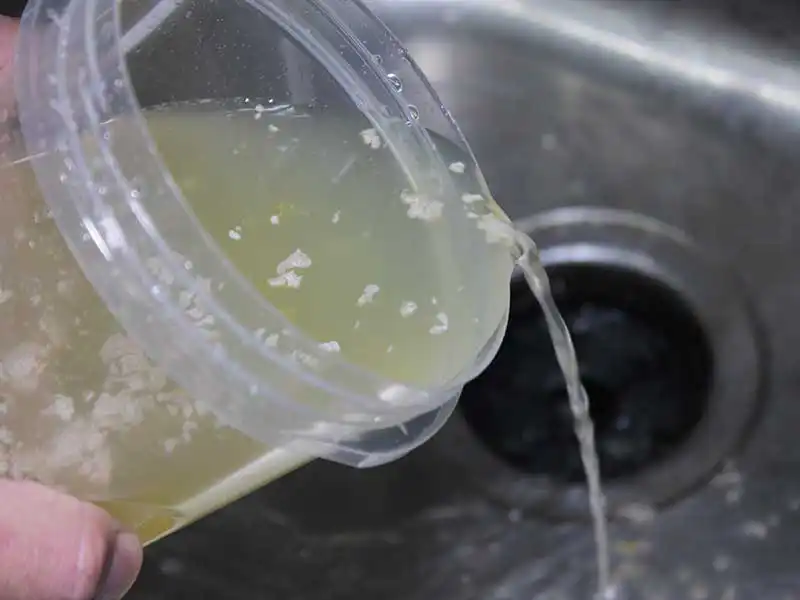
Once the mold has been removed and the water is clear, pour the seeds into a fine mesh strainer. Run the seeds under water and use your fingers to rub them around on the strainer a bit to ensure you remove any remaining bits of mold.


Drying the Tomato Seeds
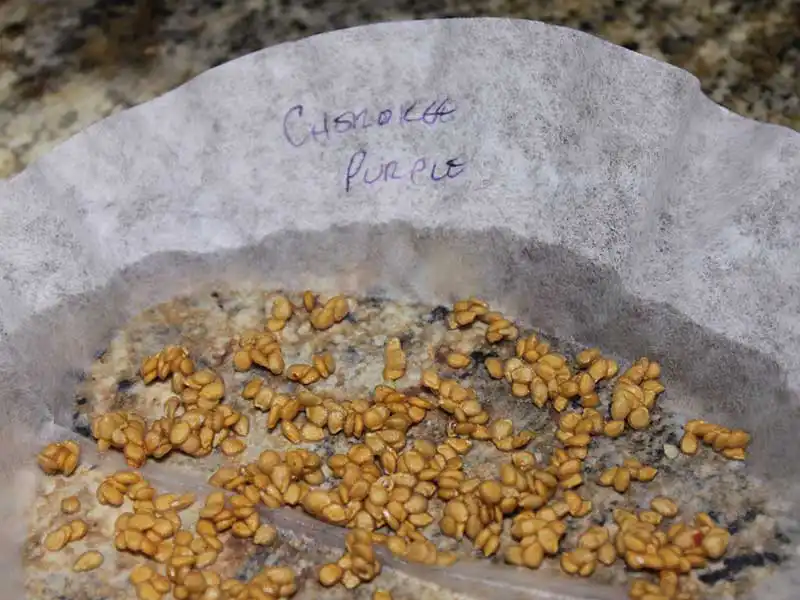
Place the seeds on a coffee filter in a single layer to dry. Avoid using paper towels or paper plates, as the seeds will stick to them. Label the filter and allow the seeds to air dry completely for about 1-2 weeks, depending on the humidity in your area.

Patience is Key
The fermentation method requires some patience, as the process can take a few days and the seeds need time to air dry completely. But the results are worth it! I’ve found that the fermentation method produces healthy, viable seeds that germinate well and grow into robust tomato plants.
Store the Seeds
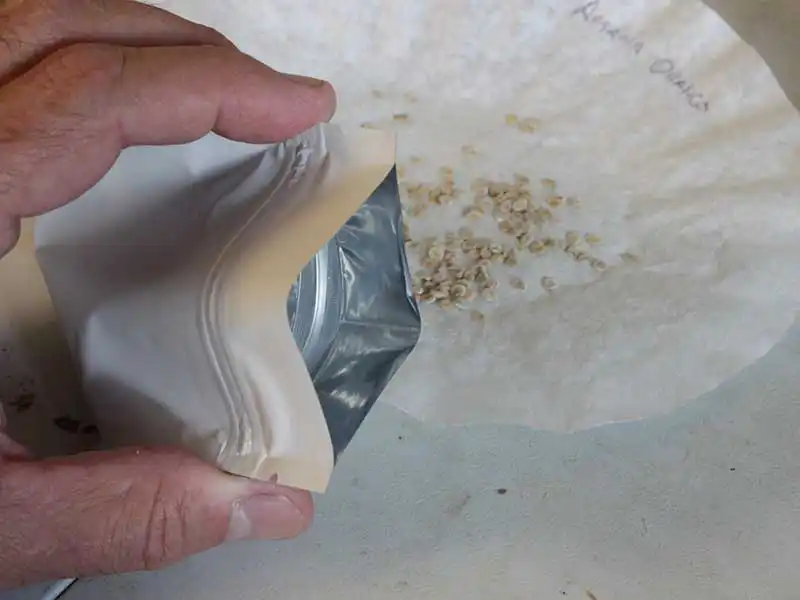
Once the seeds are fully dry, it’s time to store them for future use. You could use glass mason jars, small envelopes, or plastic zipper bags for storing the seeds. Be sure to label the container with the tomato variety, the date of collection, and any other relevant information.
You’ll need to store the seeds in a cool, dry place, away from direct sunlight and moisture. Avoid storing the seeds in a hot or humid area, as this can reduce their viability.
Check the seeds periodically for any signs of mold or moisture. If you notice any mold or moisture, remove the affected seeds and allow the container to air out before sealing it again.
Personal Tip: Be Organized
To stay organized, I like to store my tomato seeds in foil lined zipper bags labeled with the tomato variety and the date of collection. I also keep a gardening journal where I record the details of each seed-saving endeavor, including the variety, date of collection, and any observations or notes. This helps me keep track of my seeds and ensure that I’m using the oldest seeds first to maintain their viability.
Common Problems When You Save Tomato Seeds
As with any gardening endeavor, saving tomato seeds may come with some challenges. Here are some common problems and solutions to help you troubleshoot:
Problem: Cross-pollination between tomato varieties
Tomatoes are primarily self-pollinating, but cross-pollination can occur through wind, insects, or other factors, resulting in seeds that may not produce true-to-type plants.
Solution: To prevent cross-pollination, isolate different tomato varieties through distance or using physical barriers such as row covers or organza bags to cover the flowers until pollination occurs. If you have limited space, consider growing only one tomato variety per season or using hand pollination techniques to control pollination.
Problem: Improper drying or storage of seeds
If tomato seeds are not properly dried or stored, they can become moldy or lose their viability, resulting in poor germination rates.
Solution: Ensure that tomato seeds are fully dry before storing them in a cool, dry place as described earlier in this article. Avoid storing seeds in plastic containers, as they can trap moisture and promote mold growth. Instead, use mason jars or paper envelopes, and check the seeds periodically for any signs of mold or moisture.
Tips and Tricks for Successful Tomato Seed Saving
Here are some additional tips and tricks to help you successfully save tomato seeds:
- Choose healthy, ripe tomatoes for seed saving. Avoid using overripe or diseased tomatoes, as they may produce less viable seeds.
- Label your seeds with the tomato variety and the date of collection to keep track of them and ensure that you’re using the oldest seeds first.
- Rotate your tomato plants each year to prevent the build-up of pests and diseases in the soil.
- Experiment with different tomato varieties to discover new flavors, colors, and shapes. Saving seeds from heirloom or open-pollinated tomatoes can help preserve genetic diversity in tomato plants.
- Share your tomato seeds with friends, family, or fellow gardeners to promote seed swapping and community engagement in gardening.
- Have fun and be patient! Seed saving is a rewarding and fulfilling process that allows you to connect with the natural cycle of plant growth and reproduction.
Conclusion
Saving tomato seeds is not only a practical way to continue growing your favorite tomato varieties, but it’s also a fulfilling and rewarding experience that connects you with the beauty of nature and the joy of gardening. By following the simple steps of seed extraction, fermentation, drying, and storage, you can successfully save tomato seeds and enjoy a never-ending supply of tomatoes for years to come.
I hope this guide has provided you with the knowledge and confidence to start saving tomato seeds in your own garden. Remember to be patient, observe best practices for seed saving, and have fun experimenting with different tomato varieties. Don’t forget to share your own gardening tips and experiences in the comments below. Happy gardening!
FAQ: Saving Tomato Seeds
Can I plant tomato seeds straight from a tomato?
No, tomato seeds should not be planted straight from a tomato fruit. The seeds need to go through a process of fermentation to remove the gelatinous coating that can inhibit germination.
Can you save seeds from green tomatoes?
Yes, you can save seeds from green tomatoes, but it’s best to allow the tomato to fully ripen and mature on the vine before harvesting the seeds. Green tomatoes may not have fully developed seeds, which could affect their viability and germination rates. It’s recommended to save seeds from ripe, healthy tomatoes for the best results.
How many years do tomato seeds last?
Tomato seeds can remain viable for several years if stored properly. Under optimal conditions, tomato seeds can last up to 5 years or more. However, germination rates may decrease over time, so it’s best to use fresher seeds for higher success rates. Proper storage in a cool, dry, and dark environment can help prolong the shelf life of tomato seeds.
Can you save seeds from store-bought tomatoes?
Yes, you can save seeds from store-bought tomatoes, but it’s important to keep in mind that store-bought tomatoes are often hybrid varieties, which may not produce plants with the same characteristics as the parent plant. However, if you’re interested in experimenting and trying to save seeds from store-bought tomatoes, you can still collect and dry the seeds for future planting.
Can you freeze tomato seeds?
Yes, you can freeze tomato seeds, but it’s not recommended as a regular method of seed storage. Freezing can damage the seed’s cellular structure and reduce its viability. It’s best to store tomato seeds in a cool, dry, and dark place, such as an airtight container in the refrigerator or a cool basement. Freezing may be used as a short-term option for seed preservation, but it’s important to ensure the seeds are properly dried before freezing and kept in a moisture-free environment.


