If you’re a fan of spicy food or just love the vibrant colors and flavors of peppers, why not try growing your own pepper plants? Starting pepper plants indoors is a great way to ensure a successful harvest, especially if you live in a region with a shorter growing season.
In this blog post, we will guide you through the process of starting pepper plants indoors, from selecting the right seeds to caring for your plants until they are ready to be transplanted outdoors.
Choosing the Right Pepper Varieties
Before you start pepper plants indoors, it’s important to choose the right varieties that suit your taste preferences and growing conditions. There are numerous types of peppers available, ranging from sweet or mild peppers to fiery habaneros. Consider factors such as the level of heat, size, and color of the peppers you prefer.
Starting Seeds Indoors
Pepper plants require a long growing season, so it’s best to start the seeds indoors 8-12 weeks before the last frost date in your area. Here’s how you can start your pepper seeds:
- Fill seed starting trays with a high-quality seed starting mix.
- Moisten the soil before planting the seeds.
- Plant the seeds about 1/4 inch deep.
- Cover the seeds lightly with soil and gently press them down.
- Place the trays or pots in a warm location, ideally around 70-80°F. Use a seedling heat mat and thermostat.
- Keep the soil consistently moist, use a humidity dome.
- Once the seedlings emerge, provide them with 12-14 hours of light per day using grow lights or by placing them near a south-facing window.
No products found.
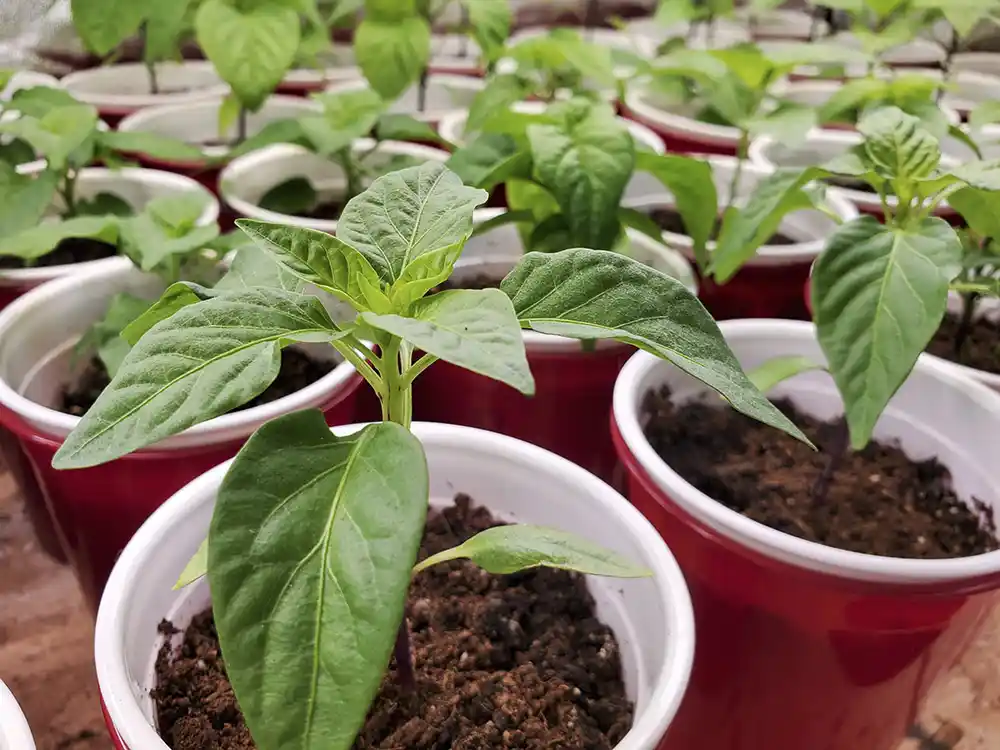
Transplanting Seedlings
When the seedlings have developed their first set of true leaves, it’s time to transplant them into larger containers. Follow these steps:
- Choose containers that are at least 4-6 inches deep and have drainage holes.
- Fill the containers with a well-draining potting mix.
- Gently remove the seedlings from their trays, being careful not to damage the delicate roots.
- Place each seedling in its own container, burying it up to the first set of leaves.
- Water the seedlings thoroughly and place them in a sunny location or under grow lights.
- Continue to water the plants regularly, allowing the soil to dry slightly between waterings.
No products found.
Caring for Indoor Pepper Plants
To ensure healthy growth and a bountiful harvest, it’s important to provide proper care for your indoor pepper plants. Here are some essential tips:
- Provide adequate light: Pepper plants require at least 6-8 hours of direct sunlight or 12-14 hours of artificial light per day.
- Maintain the right temperature: Keep the temperature around 70-85°F during the day and slightly cooler at night.
- Water regularly: Pepper plants prefer evenly moist soil, so water them when the top inch of soil feels dry. Using a moisture meter can be helpful.
- Fertilize appropriately: Use a balanced organic fertilizer every 2-4 weeks to provide essential nutrients.
- Prune if necessary: Remove any damaged or diseased leaves to promote airflow and prevent pest infestations.
No products found.
Common Problems when Starting Pepper Plants Indoors
Like any plant, peppers can have their issues. But don’t worry, you’ve got this.

Helmet Head
One of the most common issues when you’re starting pepper plants indoors is the “helmet head”.
The term is used to describe a situation where a seedling struggles to shed its seed coat after germination. The seed coat, or the ‘helmet’, can stick to the emerging seedling and hinder its growth.
If the seedling can’t get rid of the seed coat on its own, it might hinder the development of the leaves and, in some cases, can lead to the death of the seedling. This usually happens when the seed coat is too hard or the environment is too dry, preventing the seed coat from softening and falling off naturally.
To prevent helmet heads, you can try soaking your seeds before planting to soften the seed coat or provide adequate humidity through use of a humidity dome to keep the seed coat soft.
Other Common Issues
Peppers can also suffer from various diseases and pests. Good hygiene and careful observation can prevent many of these problems. So keep an eye on your little green babies.
| Problem | Possible Causes | Solutions |
|---|---|---|
| Seeds not germinating | Seeds too old or of poor quality – Soil temperature too low – Soil too dry or too wet | Use fresh seeds from a reliable source – Maintain soil temperature between 70-85°F – Keep soil consistently moist, but avoid overwatering |
| Seedlings are tall and spindly | Insufficient light – Temperature too high | Move seedlings to a brighter location or use a grow light – Maintain an optimal temperature range |
| Yellowing leaves | Overwatering – Nutrient deficiency | Water only when the top of the soil feels dry to the touch – Apply a balanced, half-strength fertilizer |
| Drooping or wilting leaves | Underwatering – Overheating | Keep the soil consistently moist – Maintain an optimal temperature range and avoid direct hot sunlight |
| Leaves have spots or mold | Fungal disease – Overwatering | Improve air circulation and avoid watering the leaves directly – Water only when the top of the soil feels dry to the touch |
| Slow growth | Insufficient light – Nutrient deficiency | Move seedlings to a brighter location or use a grow light – Apply a balanced, half-strength fertilizer |
| Pests (like aphids, whiteflies) | Poor hygiene – Lack of beneficial insects due to indoor growing | Keep the growing area clean – Use a natural insecticidal soap or introduce beneficial insects if possible |
Transplanting Outdoors
Once the danger of frost has passed and the outdoor temperatures are consistently warm, you can transplant your pepper plants into the garden or larger containers. Harden off the pepper plants by gradually exposing them to outdoor conditions over the course of a week before planting them in their permanent location.
Choose a sunny spot in your garden with well-draining soil. Dig a hole slightly larger than the root ball of each plant and gently place it in the hole. Backfill with soil, firming it around the base of the plant. Water thoroughly after transplanting and continue to care for your pepper plants as outlined above.
In Conclusion
Starting pepper plants indoors is a rewarding and enjoyable way to grow your own delicious peppers. By following the steps outlined in this blog post, you’ll be well on your way to a successful pepper harvest. Remember to choose the right varieties, start the seeds indoors, provide proper care, and eventually transplant your pepper plants outdoors.
FAQ: Starting Pepper Plants Indoors
Is it better to start seeds in paper towel or soil?
While the paper towel method can speed up germination, starting seeds directly in soil is usually better. This avoids damaging the delicate roots when transplanting.
How do you start pepper seeds in a paper towel?
Moisten a paper towel, place your seeds on it, fold it over, and put it in a sealed plastic bag. Keep it warm until the seeds sprout, then carefully transplant them to soil.
How do you germinate pepper seeds without a heat mat?
Without a heat mat, you can place your seeds in a warm location like the top of the refrigerator or near a heating vent to encourage germination.
How many pepper seeds to plant per hole?
Plant 2-3 pepper seeds per hole. Once they germinate, thin out the weaker seedlings, leaving the strongest one to grow.
Do you germinate pepper seeds in dark or light?
Pepper seeds should be germinated in the dark. They need warmth more than light. Once they sprout, they should be moved to a light source.